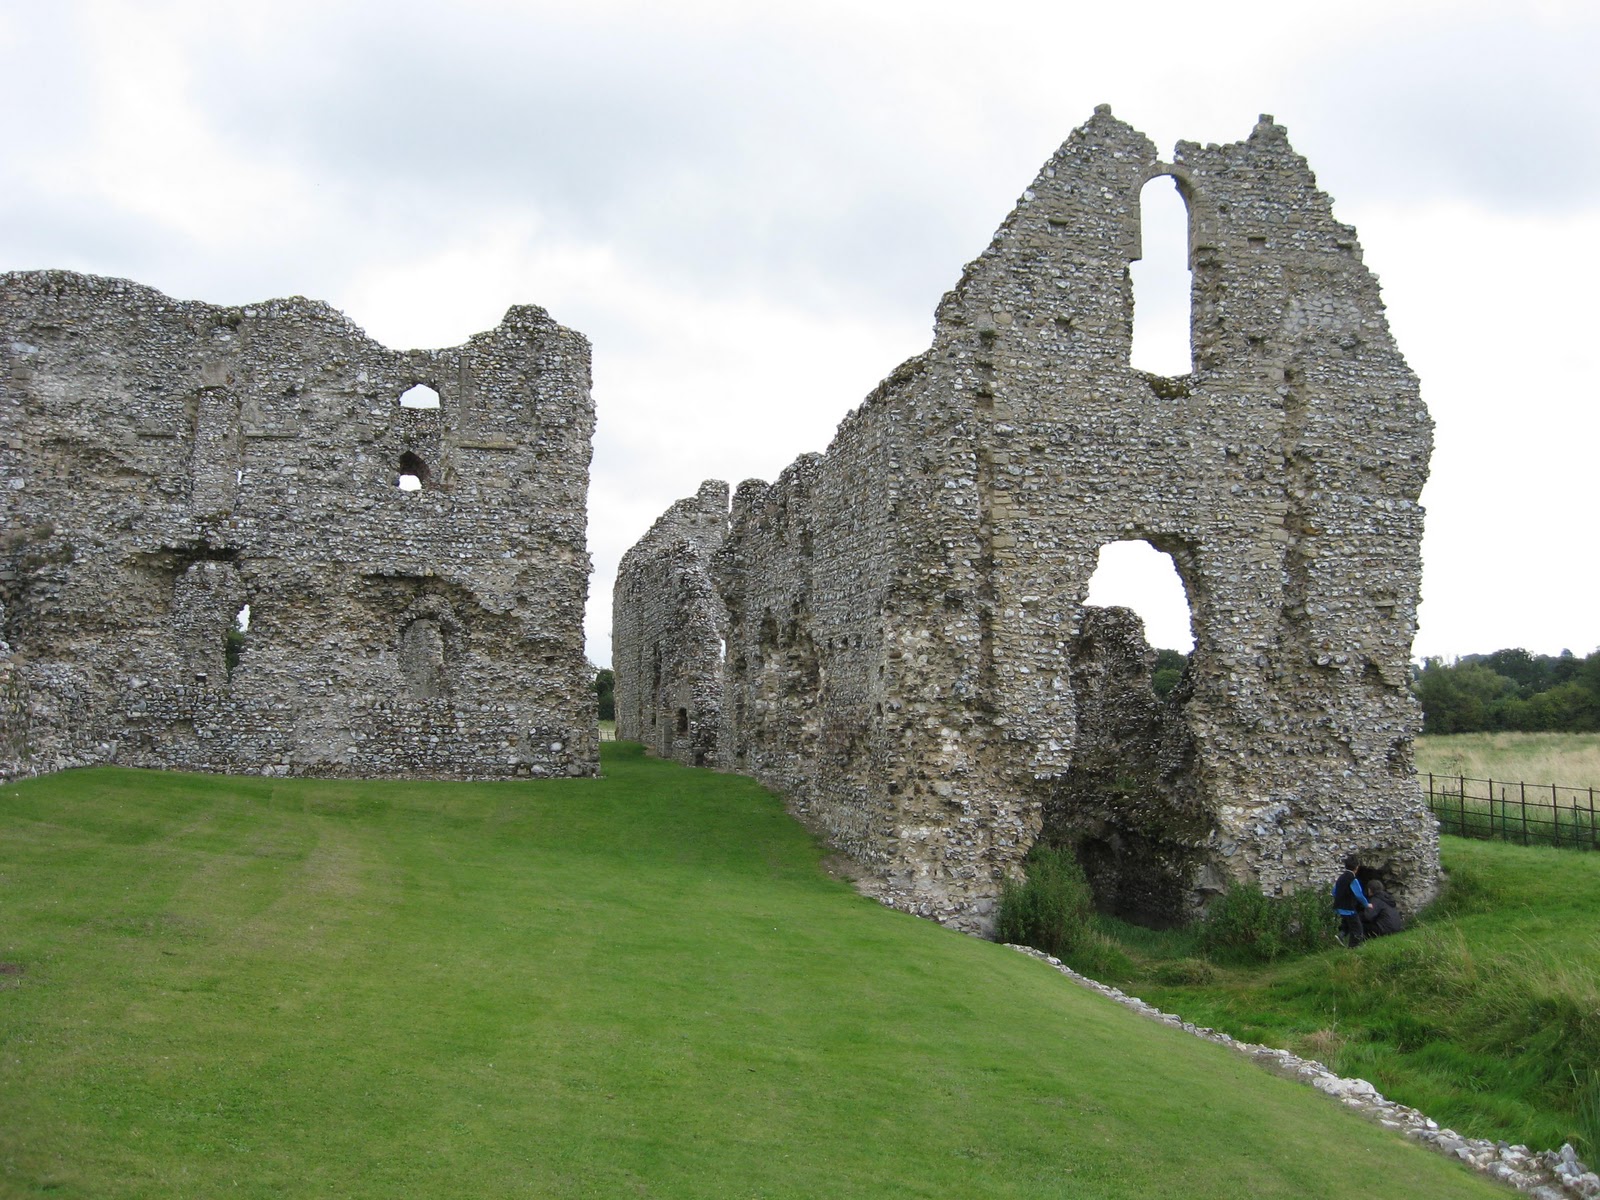
To understand more about how the monks actually lived, we visited the magnificent ruins of Castle Acre Priory. The site has been very well preserved so, with some imagination and by reading the clearly labelled and very detailed sign boards, you can have a very good sense of the size of the original place, what each area was used for, and the activities that took place hundreds of years ago.
To recreate the experience of the monks (as best as I could anyway), I served up Caules Broth (Cabbage Soup). I had to add meat into the soup (apparently meat was allowed when the monks were ill) for the men in this house to have it. The verdict: it was ok, but too bland for our taste. Poor Tortoise was in dismay when he was served monk's soup for dinner that night, exclaiming that he got married so that he would not have to live like a monk! I guess that means we won't have that soup again in this house.
What else did medieval monks do? Some were given the task of copying manuscripts. This led to us investigating how illumination was done, which has become an entire topic by itself. So far, Tiger has done some preliminary work in this area by trying his hand at making an illuminated alphabet. He has always been eyeing the pen set that I use for pen and ink drawings so this was his chance to get his hands on them.
He started off by practising basic medieval lettering. He tried all the different pen nibs before finding the one that worked best for his purpose.
Once Tiger had had enough practise, he copied a sentence (he refused to do more) onto a page in his notebook using his chosen nib and ink. The sentence took three times longer than his normal writing speed to complete, after which he began to illustrate the beginning alphabet. The black outlines were done in ink, while the rest was completed with felt-tip pens and gel pens.
The work shows that Tiger has understood the idea of illuminated alphabets, but I told him that the (imaginary) head monk would expect to see more effort put into the illustration before he would accept it as being fully completed. At this point, I was reminded that "Daddy said we are not monks, and this is not a monastery." That was the end of that conversation.
Being a Mum-with-a-cunning-plan, I'll find ways for us to do some more work on this. Watch this space!
This post is linked up to several blog hops, where you can visit to see what other homeschoolers have been busy with.
The Treasures of Heaven exhibition at the British Museum, which showcased many sacred pieces from medieval Europe, was a very good introduction to this topic.
We also listened to stories of European pilgrims and saints,
learned about the significance of pilgrimage, and the design of pilgrim badges. We learned that pilgrim badges were nearly always round, but Tiger decided that he preferred his to be rectangular.
When learning about saints and pilgrims in Britain, we would no doubt come across the story of Thomas Beckett's murder during the reign of Henry II.
As a result of his martydom, Thomas Beckett was made a saint, and the murder scene at Canterbury Cathedral made a pilgrimage site. Canterbury Cathedral is too far for us to visit, but we did have a good look around it using the virtual tour facilities here.
The books Tiger read for this topic were:
This post is linked up to several blog hops, where you can visit to see what other homeschoolers have been busy with.
This is a classic experiment, I think, judging from the numerous examples on the internet I have found of the same experiment conducted all over the world.
The basic ingredients are: mentos and soda. Since I am a curious Mum, I wanted to see whether the experiment works with other minted sweets, such as Polo. My initial hypothesis was that the chemical reaction (as you will see later) was caused by the mint flavouring, so it would not matter which type of mint was used.
I knew it was going to be a messy experiment, so we did it in the back garden. Sure enough, the mentos fountain was spectacular, even though it only lasted for 5 seconds.
You can see the experiment more clearly in the following video:
We then tried to do the same with Polo sweets. It did NOT work. So, my hypothesis was wrong. One good thing about being wrong is that we can go on to find out why we are wrong and then correct our erroneous belief/hypothesis.
After reading different articles and listening to the explanation provided in the video above, we figured out that the hollow space in the Polo sweet does not allow enough air bubbles to build up (compared to the surface area that each mentos sweet has), which in turn does not give enough pressure to push the soda out of the bottle. Of course, I'm sure other factors such as the different chemicals used to make Polo sweets will affect its interaction with the chemicals in the soda, but we will leave this further investigation for when we actually concentrate on chemistry lessons and learn about the different elements.
Here is a good one that explains the science behind the experiment. Once again, there is no straightforward, simple answer. Different people have different theories about why the reaction happens. That's the beauty of science, isn't it? That there is always something new to learn.
This post is linked up to several blog hops, where you can visit to see what other homeschoolers have been busy with.
This week the weather has taken a turn for the worse. It has been cold, wet and generally miserable most of the time. When we did manage to catch a dry few hours, we were out in the woods.
As the weather gets colder, we start to see squirrels very busy gathering their winter supplies. This is the best time to learn about nuts and cones because they are everywhere -- if the squirrels don't get to them first!
Along the way, Tiger spotted many opened, prickly husks on the ground full of fallen leaves. Curious to see what the seed or nut inside those may be, we stopped and examined the husks. There were still a few on the trees.
They looked suspiciously like sweet chestnuts, so we looked more closely at those that have fallen on the ground. There were a few nuts still attached to some of the husks we picked up, and they indeed were sweet chestnuts! Wow. There is something very satisfying about being able to find and identify edible food in nature, so all of us started to push away the leaves in order to find more sweet chestnuts that might be hidden under them. We are no experts in the area of foraging at all, which is why this discovery was all the more appealing to us.
Remember, the ground was very damp that day, and was covered with leaves. When Tiger suddenly yelled, "Why is this pile of leaves moving by themselves?" we gathered round to look. Indeed, the leaves seemed to be vibrating and moving slightly. Tiger then turned some leaves over and we saw this: a nest of larvae!!! Yucks!!!
The larvae are the black 'lines'.
I am not a fan of larvae or maggots, and to see them (there must have been hundreds) all wriggling and vibrating just made me.... slightly uncomfortable, to say the least. Nonetheless, it was a very interesting find (since we don't find such things every time, thank goodness) so I managed to take the photograph, admired the discovery for a few moments, then asked Tiger to put the leaves back so as not to disturb the nest.
We ended our day with a plate full of roasted sweet chestnuts:
This post is linked up to several blog hops, where you can visit to see what other homeschoolers have been busy with.
Our second artist study was about Degas, focusing specifically on his work about ballet dancers.
Picture Study
To get ourselves aquainted with Degas' work on ballet dancers, I blue-tagged the cards on the door of the cupboard in our lounge (where we spend the bulk of our time) so that Tiger could look at them. These cards were part of a 'famous art works greeting cards' set that I had bought years ago in a bookstore.
We also watched the following documentary that focuses on a one specific piece of work -- The Little Dancer aged Fourteen. The documentary gives a detailed background about Degas' life and the circumstances surrounding his making of this sculpture, as well as the personal story of the actual dancer, which I found to be very insightful and useful to understanding the artist and this particular sculpture much better:
I took this opportunity to look through the following books for myself. Although Degas has always been a very familiar name, I did not know in detail about his work on the dancers or his life.
The first activity, a crayon resist, has to do with how Degas captures movement. The idea is:
1) to draw the outline of a moving object (it can be a car, a human being, an animal) onto a strong piece of card,
2) cut that out to be used as a stencil,
3) use the stencil to draw overlapping shapes on another piece of paper, using wax crayons
4) give it a wash.
Since we want to focus on ballet dancers' movements, I asked Tiger to choose one posture that best represents movement from the library book I borrowed specifically for this project.
Tiger took a while to look through most of the pages until he finally decided upon his favourite pose. He liked it so much that he even tried to do it himself.
Since the goal at this stage of the project was to create the stencil, I did not expect Tiger to draw the outline of what he saw so I let him trace it on a piece of tracing paper before transferring the outline to a piece of card, and cutting it out.
Next steps: create the movement with overlapping figures, then give it a wash.
I modified the second activity slightly since the suggestion in the book was too complicated and too fussy (for me). Instead, I gave Tiger a small square canvas and my box of chalk pastels and let him got on with the exercise. The original idea in the book was to brush a piece of cotton cloth with milk, which I assumed was to prime the cloth to help the pastels bind better. Tiger thought using milk as a primer was an interesting idea to try out, so that was the only part of the book's suggestion that we used. Tiger also decided that he wanted to do a copy of his favourite Degas piece, so he pinned it beside the canvas for reference.
Field Trip
The Royal Academy of Arts is currently holding a Degas and the Ballet exhibition, which has generated much interest in the world of art lovers, since the RA has managed to borrow quite a number of rarely-seen-in-public pieces of Degas' work from all over the world (including from private collections). Look at the queue outside the RA for tickets to this exhibition. I took this photo outside the RA when it opened at 10a.m., and the queue had become much longer in the afternoon.
We were there primarily to take part in a family workshop based on this exhibition. Interestingly, Tiger was one out of three boys in this workshop, the rest (about 20) were girls.
The workshop started with a very informed and detailed slide presentation of Degas' life, the influences of his work, and his major works, by a very animated artist. The presenter was very engaging with the workshop participants, and he had obviously did a thorough research on the subject matter. As a precursor to us actually seeing the exhibition, he covered aspects of (1) how the ability to capture movement was made possible with development of photography and its influence on Degas' works, (2) how the Parisan society at that time saw the notion of ugliness versus beauty in art and in people of different social classes, (3) how Degas' fascination with the different classes of people affected his choice of subjects and how he portrayed them in his paintings.
After the slide show, we were ushered into the actual exhibition with a volunteer guide. The guide we had was a very friendly elderly lady who was very enthusiastic about the exhibition and who was also very patient and kind to the children. She showed the children many of the most famous pieces of art work and briefly explained their significance while at the same time engaging the children by asking interesting questions related to the art pieces. This 'kiddy exhibition tour' lasted 45 minutes.
Then we went back to the workshop room for hands-on work. First, we were each given a black-and-white photocopy of Degas' charcoal work, Dancer Leaning on a Pillar. We were to fill in the colours using chalk pastels. This part of the workshop was to acquaint us with pastels and the use of colours.
Tiger's version
Mum's version
The next part was really wonderful. RA actually hired the top ballet dancer from the English National Ballet to pose for us!! Tiger was really pleased that he got to draw a live model. Everyone, especially parents, was instructed to do his/her own work and not to interfere with someone else's creation. We were given charcoal and chalk pastels to work with.
The ballerina did four poses of 1.5 minutes each, while everyone sketched furiously with our charcoals to capture whatever was significant to each of us. After the initial sketching time, we were then given 10 minutes to fill in our colours with pastels. I decided that I liked my drawing as it was, so I left it at the sketching phase.
Tiger's ballerina
Mum's 1.5-minute sketches
After the workshop had ended, Tiger and I went back into the exhibition and spent another 2 hours looking at all the art pieces, including a bronze copy of The Little Dancer. The audio guide that we used was really useful to explain about the background, significance and relevance of most of the exhibited pieces.




 What else did medieval monks do? Some were given the task of copying manuscripts. This led to us investigating how illumination was done, which has become an entire topic by itself. So far, Tiger has done some preliminary work in this area by trying his hand at making an illuminated alphabet. He has always been eyeing the pen set that I use for pen and ink drawings so this was his chance to get his hands on them.


